Saturday, September 15, 2012

Iterations

With a design chosen, it's time to start making a pattern.  After working at it for a bit, this is more difficult than I thought it was going to be.  We started by learning how to make a basic sheath pattern by combining the bodice and skirt patterns.  After removing 3/8" from the bodice waistline, closing one of the darts in the skirt, and slashing and spreading the narrower of the two pieces, these pieces can be combined.  Here's the half-size pattern.

Unfortunately, in the full-size pattern, the skirt front and skirt back end up not being the same width, so more pattern adjustments  have to be made.  I'm still working on getting that part fixed.  Unfortunately, I forgot to bring my homework home!  (I did bring it back from the classroom to my office on Thursday, but due to numerous other meetings Thursday afternoon and complications with needing to take my bike home and rain, I didn't take the pattern pieces home that day.  I never made it back to the office on Friday since I was gone to a conference. So on Saturday I'm blogging about my problems instead of actually solving them.)

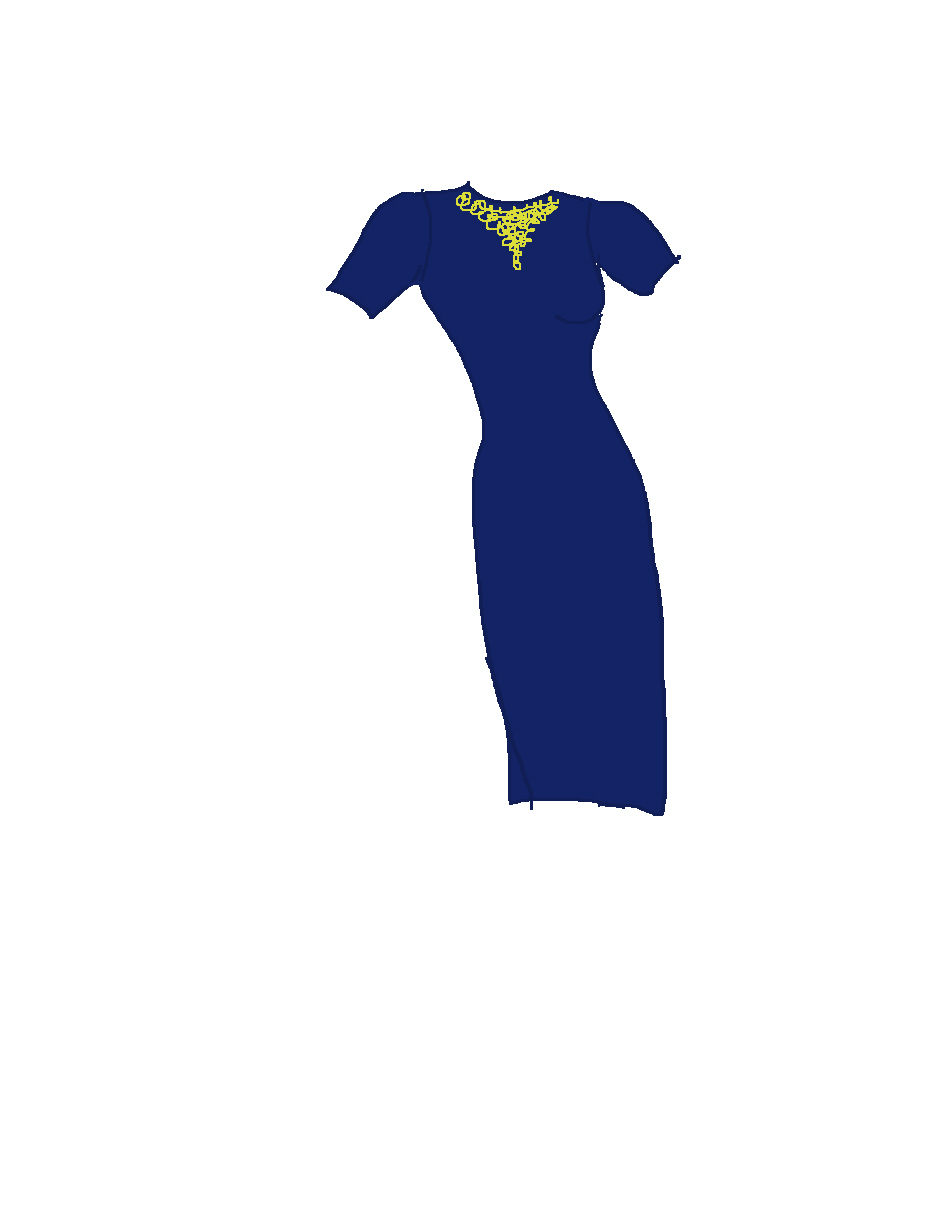
Meanwhile, trying to lay out the asymmetric bodice did make me think more clearly about the design.  My original design sketch said to make the dress with a back zipper.  However, after looking at the back view of the original pattern, I found that it didn't have a zipper.  And a suggestion from the instructor that I add pockets in the skirt (of course!  I hate skirts and slacks without pockets) made me think about the features that I really like in a dress.  Back zippers are not at the top of my list.  Thus I decided to eliminate the zipper in back and change to button-front closure, which meant I had to do something to open the skirt at the waist.

My first thought was to extend the bodice opening down to about mid-thigh and put a hidden placket in the skirt.  This might be the easiest option. However, to really get the placket in, the skirt needs a seam down the skirt, which means the dart on the other side also needs to be a seam, which leads to princess seams.


Instead of a hidden placket, it occurred to me that I could turn this dress into a coat dress.  The darts in the original design were just at the side bust and waist.  When I tried drawing the pattern for the bodice front, I had trouble figuring out where to position the three buttons and getting the dimensions right for the neckline swoops.  A retired professor who was visiting our class suggested that the buttons needed to fall on a seam line.
Note that I still need to figure out where the princess seam falls at the shoulder in relation to the two inset pieces.  Should it be outside the insets?  Exactly meet the inset? End on the second inset?

Just last week, a friend helped me clean out my closet, and we went through the cedar chest, too.  At the bottom I found my hot pink "birthday suit". (For my birthday one year Mom bought the fabric, Aunt M bought  the pattern, and Granmom sprang for the twenty-five gold buttons.  Mom helped me put it together and it was a definite learning experience.)  Alas, I no longer have a twenty-four inch waist, so I can't button it all the way down any more.  My friend suggested I could wear it open as a coat.  This pattern is a coat dress, and I loved it.  Since I still have the pattern, I thought I'd dig it out and check out where the seams were in relation to the buttons.


This pattern has the princess seams ending in the armscye instead of on the shoulder.  However, the front pieces are more vertical than my design.  So here are sketches with the seam in the armscye.  Last considering: should the design be truly asymmetric, with the underside of the bodice forming a round neckline, or should the two pieces be more symmetric, with a curved vee neckline? I think these were all the iterations that I should have made for the last sketch assignment.


And, if this is a coat dress, it needs to be fully lined.  I read all the pattern piecing instructions for that Ralph Lauren dress -- there were a lot of steps!  But, it was a beautifully finished dress.  Decisions, decisions.  Feels free to weigh in.

Meanwhile, I'm supposed to be keeping a design notebook for this dress with all of these notes included.  Which reminds me that my physics research notebook is languishing with no recent additions.  However, I did conquer LaTeX (sort of) and get a paper submitted for publication this week.

Thursday, September 6, 2012

The dress

This week we got the compiled "peer reviews" from the other members of the class.  So which dress (from the first group) did my compadres in the 20-year-old range like?  Dress #8!  My least favorite.  Huh.  I must be getting old.  I think that second place went to Dress #1 with Dresses #2 & 6 tied for third place.  

But, the dress that we actually make is from the second set of sketches, and the dress that got two stars from my teacher also happened to be my favorite: Dress #3b.  This one is actually vintage inspired from a picture I found on the internet. 
asymmetric neckline -- color blocking possibility
Vintage 1950s Butterick 6866 Unusual Button Tab Shirtwaist Dress SEWING PATTERN Size 16 Bust 34 Medium

Color blocking is in, so my challenge this weekend will be to find a three different fabrics that will go together for the collar, or best yet, three shades of the same fabric.  Next week I'll start making the pattern.

Oh, hey, I can actually order the original size 16 pattern.  Let's see, converting 1950's dress sizes to today's dress sizes, I bet that's a 4.  Almost my size. ;)  But wait, the actual measurements are listed: 

Vintage size 16 Modern Medium Bust 34 Waist 28 Hips 37

Yup, almost my size.  But I'm going to put a slimmer skirt on it.  I may also need to add another embellishment or fabric manipulation to it, so be thinking about that!

Monday, September 3, 2012

Revised Sketches

Here are the new sketches, with multiple iterations of my six favorite themes.  I didn't do this assignment quite right, as I was supposed to do multiple iterations of only my top two or three favorites, but there were things that I really liked about all six of these.  To make up for it, I came up with more than the required twenty.  
Dress 1 a,b,c

Dress 2 a,b,c,d,e

Dress 3 a, b, c, d, e

Dress 4 a, b, c

Dress 5 a, b, c, d, e

Dress 6 a, b, c, d

Friday, August 31, 2012

Slopers

This week we actually started learning the nuts and bolts of pattern design, starting with Chapter 2 in 

Principles of Flat Pattern Design (4th Edition) [Spiral-bound](Check out the price on Amazon -- glad I found it for considerably less using bestbookbuys.com.  And I thought physics texts were expensive!  Doing a quick order-of-magnitude estimate, I think there may be about the same number of fashion designers in the world as physicists, and we're a pretty small group.  Hence expensive books.   With any luck, I'll design enough patterns to earn back the price. ;)  )

and Chapter 2 in 

Pattern Making by the Flat-Pattern Method(This is the one I bought, but not the newest 8th edition. I like this cover picture better, though.)

So, what is a sloper?  A sloper is a basic pattern template that you can manipulate to create most any pattern.  The books come with half-size slopers in the back, which are nice to work with when you are learning pattern manipulations.  And, dresses made with the half-size slopers are so cute -- check out some examples that are displayed in the classroom from previous years.  


One note about the slopers -- they don't include a seam allowance.  My mom tried a computer-aided pattern design program to make patterns to sew for me long distance about umpteen years ago.  After a full afternoon making measurements with all sorts of magic marker lines drawn on my body, the muslin made from that pattern fit me like a glove.  As in skin tight.  I wonder if it made a "sloper" pattern without seam allowances included.   

We started by learning to move the darts in the front bodice sloper.  Key points: 
1. The bust point marked on the pattern is the fixed point on the pattern.     Everything else revolves around it (literally).  Stick a pin in it.  
2.  Start where you want to end -- when you open a new dart, you start tracing around the sloper from the point where the dart will open.  This is also where you stop tracing.
3.  New darts created have to have the same total angle as the closed dart.  In physics, this would be a conservation law: Total dart angles are conserved.  

At least, total dart angle is conserved when you split one dart into two.  It's really a bit more arbitrary than that, because you actually want to fit a person when you're done, and most persons don't fit exact mathematical models. :)  

Our first exercise: move a bust fitting dart from the side seam to a dart in the shoulder seam. Starting from the point on the should seam where you want the dart, trace around the sloper until you come to the side dart, then rotate the sloper (about the pin stuck in the bust point) until the side dart is exactly closed. Continue tracing around the sloper until you reach the point on the shoulder seam where you started.  The two legs of the new dart are drawn to a point within the bust circle, which is a circle centered at the bust point with a diameter of about three inches.  Here are pictures of the original sloper, and new new one with the dart moved.


And that was just the first example in the book, using the "rotation method" to move the dart.  Only fifty-nine more pattern manipulations to go.  (No, I really haven't counted them.)

Next assignment is to make twenty more dress designs, playing with variations on two or three of the designs from this week.  My challenge is to add more decorative darts, move away from the basic fitting darts, and to include more embellishment and design elements.  This is an apparel design course, after all, so I need to come up with something more exotic than the usual princess seams.   

Sunday, August 26, 2012

Trends


Before starting to design a dress, some idea of what is in style is helpful.  With a little sleuthing around on style.com and WGSN, I found some trends for fall/winter 2012/2013 that I could actually live with.  

On the “confirmed trend” list was a slim silhouette with sleeves (a more covered-up look), using prints for contour seaming, fabric/color blocking, contrast inserts, paneling details, and embroidery or jeweled embellishments.  Colors tend to be a dark base with lighter colors and prints used for contouring.  Military and Asian influences are quite popular.    Stella McCartney’s designs with lots of navy/cobalt/white embroidery were stunning, and Dolce and Gabbana had some really interesting styles – lots of gold embroidery!  Armed with this knowledge, I was prepared to turn out twenty dress designs. You can see them all below -- and let me know which ones you like!

Just as a postscript, it was noted in the beauty trends that crown braids were in.  I'm on top of that!  (And I was just wondering why all the runway models were so ugly -- that's supposed to be stylish new makeup design.)


Dress 1

Dress 2

Dress 3

Dress 4

Dress 5

Dress 6

Dress 7

Dress 8

Dress 9

Dress 10
Dress 11

Dress 12

Dress 13

Dress 14

Dress 15

Dress 16

Dress 17
Dress 18

Dress 19

Dress 20


Inspiration


Our first assignment was to bring something to class that inspires us.  This was a really hard assignment.  I tried thinking of some dresses that I had seen that I liked.  Nothing.  I tried looking online for dresses.  I tried googling work dresses and Sunday dresses and church dresses – and came up with zip.  I turned to Pinterest and tried to find something to inspire me.  Strike out!  (But I did come up with three new party decorating ideas and a new recipe.)  I even tried one of the web sites listed in the syllabus as a resource, Style.com.  Looking at the fall runway styles, I flagged a few dresses, but nothing really inspired me.  So I decided I had to think like a left-brainer, and try to let go of my right-brain, methodical side. 

My brother-in-law likes to tell about the college English class he took where the professor wanted the students to write essays about their feelings.  Engineers are not known to be good at this.  He looked out of his dorm window and decided to write about the only thing he saw – the stop light changing colors in the rain.  He wrote a lot of really silly things about how the colors made him feel – everything patently untrue and completely the opposite of what he really thought – and the teacher loved it.  A+.  This is the kind of inspiration I needed.

My area of physics is space physics, and I love Hubble SpaceTelescope pictures.  And pictures of Saturn’s rings taken by Cassini – the F ring is my favorite.  So I turned to the Hubble site and browsed the images of nebulae, which are some of the most stunning images you will ever see.  This is the image I chose for my inspiration piece. 

Hubble Observes Infant Stars in Nearby Galaxy
http://hubblesite.org/gallery/album/nebula/emission/pr2007004a/

The dress I imagined for this was a midnight blue silk with twinkling rhinestones scattered over the skirt, topped with peachy purple ombre silk scarf. Pretty good for a physicist, huh?  In class, we made sketches of the dress inspired by our muse.

Then we had to go outside and find objects in nature to serve as further inspiration – which we then had to incorporate into our design.  Lucky me – I found some frosted plums which were just the color of that nebula.  (The kids and I actually tried to make plum jam from the fruit of that tree a few years ago.  Completely inedible.  Maybe we should have gotten the plums before they fell on the ground.)  And a crepe myrtle blossom, a blue wildflower, and some green leaves. 


Taking a photo with your phone in one hand while holding bits of leaves and blossoms in the other hand is a bit difficult.  Trust me, that is a little blue flower.  Bonus -- there's a dried crepe myrtle blossom in the upper left corner.


And so that I wouldn't be so predictable, I also took a picture of shaggy gray bark and some brown, curled pecan leaves -- my one-handed photography turned that into a video, though.


Returning to class, we incorporated these new inspiration pieces into our previous designs.


Project I is actually a dress made from cotton with no contouring, plus two embellishments (fabric manipulation or embroidery, etc.).  Now I only have to come up with twenty sketches to turn in next week.  

Motivation


Do you ever think back to your college years and wish that you had taken more classes?  Are you kidding?  I was pretty much focused on fitting in all the classes that I needed to graduate in four years.  However, there are a few classes that had nothing to do with my physics major that really would have been of some benefit.  I really wanted to take a graphic design or painting class from the art department.  Those classes met in the evening for three hours at a stretch, though, and I never could see giving up six evening hours per week.  (When would I do my physics homework?)  I did manage to work in a few painting seminars and lessons from my grandmother in later years, however.


My dad really wanted me to take an accounting class.  I did the books for his retirement account when I was in high school, which really was a chore (especially the first year, when I had to go back and find all the mistakes made for the last ten years in order to get all the accounts to balance).  Even though I knew how to balance an account ledger when I got to college, my dad thought it would be good to understand how accountants think.  Since then, I’ve found that using Quicken makes balancing the accounts at home a snap, though I still wonder what the accountants are thinking every time I try to decipher the monthly budget reports for my grants sent to me from the budget office at work. 

My mom lobbied for me to take a sewing class in the family and consumer science department.  I’ve always worn a small size in petites, and it has always been a challenge to buy clothes that fit.  Some years I’ve giving up on shopping completely and headed for the fabric store to piece together a wardrobe (literally).  Other times I’ve just given up on having new clothes for that season.   Nothing is more maddening than to be shopping for professional clothes to wear to work and have the sales clerk tell you, “We don’t carry your size.  Have you looked in juniors?”  Umm, no, junior styles usually are not what I have in mind when I’m trying to look older and more sophisticated than the college students I’m teaching. 

One of the perks of being a college professor is that you can audit any class for free, and I’ve had my eye on the tailoring classes for quite some time.  But I always found an excuse or a potential conflict, and never had the nerve (or the time) to take a class.  However, the stars have now come into alignment.  I met the instructor for the apparel design and tailoring classes.  My teaching load for the semester turned out to be remarkably light.  I could even shift my stellar structures class so that it didn’t conflict with apparel design.  And, by golly, I got really disgusted with the last dress that I made that just didn’t fit right ….

So here I am, after having graduated umpteen years ago, back in the classroom as a student.  And this time, I really want to learn the material.   So despite the fact that I have four kids at home ages three through seven, and the fact that I have three papers and a grant to write before the middle of October, I decided to write a blog about this experience so that I can remember all the details later.  And so that I can get extra credit. :)